#346 - How to Make Your Cameras Match
So many parts of Post Production are a subtle blend of technical knowledge, artistic talent and enough experience to know how to get away with it.
Camera matching is one of those tasks that combines all three elements.
Wrangling footage, that, for inconceivable reasons, was shot on radically different cameras and yet needs to look identical.
In this very in-depth post over on the blog, I took at look at the colour science behind camera matching, some clever apps to retrieve the essential metadata you need and how to use FilmConvert's CineMatch plugin for superior, hassle free results.
In this sponsored issue of Cut/daily, I'll share 5 of the most useful things I discovered while putting that detailed post together, including:
- Why colour space transforms aren't enough
- How to extract hidden camera metadata from footage
- Why CineMatch can improve your stock footage
- How to use CineMatch's False Colour features
- How to use CineMatch to correctly align your LUTs
So strap on your learning caps ‘cos some of this is about to get nerdy.
Save 10% on CineMatch with the discount code "ELWYN" or download their unlimited free trial.
Make your Cameras Match with CineMatch
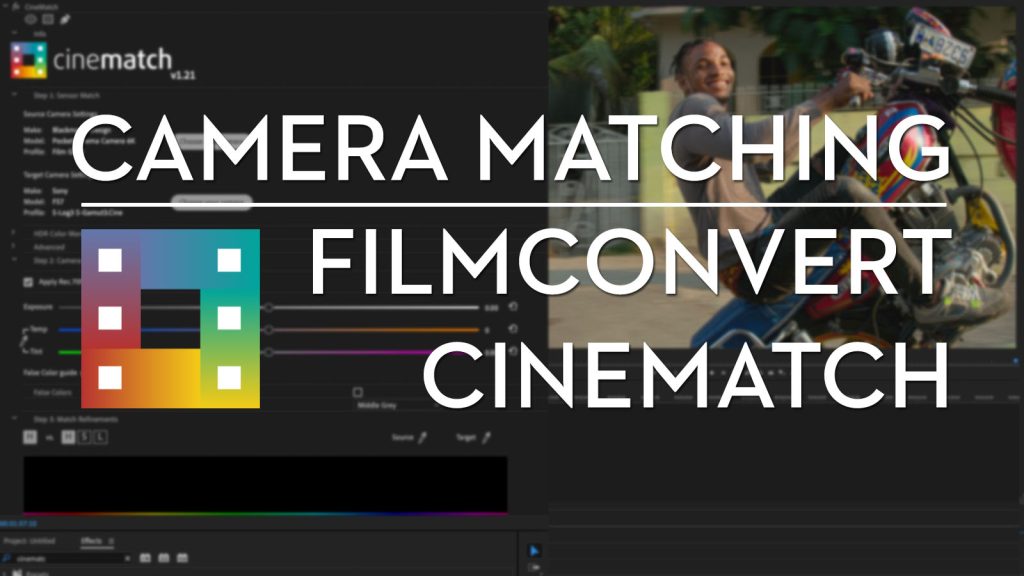
Why do you even need a plugin like CineMatch to help make footage from different cameras match?
Colour Science + Colour Space
Each camera uses a different sensor and different colour science (the gamut of the colour space and the gamma curve of the encoding) to capture the values of the light it senses and record those within a specific colour space.
So every clip has a colour space to store the data in, and a specific way of fitting that data into that space (colour science).
When you have multiple source cameras to work with, making all that footage 'look right' means mapping your various input (clip) colour spaces to your singular output (display) colour space.
Why can't I just use a Colour Space Transform?
If you add a colour space transform to your ARRI clip and tell it to act like Sony footage all you're really doing ”is applying the colour science from one camera to a sensor it wasn't designed for."
Colour Space Transforms (CST) are not enough to make your cameras match each other accurately. A colour space transform only converts the data from one colour space to another, it doesn't account for the unique characteristics of each sensor that originally captured the footage.
This, however, is exactly what CineMatch does - it accounts for both the profile of the sensor and the colour science.
Why CineMatch is different
CineMatch is a clever colour matching system that was built on the hard work of profiling over 70 different cameras to reverse engineer the details of the inherent characteristics of each camera's sensor, and all of the unique colour science that makes up the way that camera captures its images.
CineMatch is then able to transpose the differences between one camera's profile to another, enabling them to accurately match each other.
(Psst - for a lot more detail on this, hit the big post here.)
In this video you can see how this works in practice and how closely CineMatch can align ARRI Alexa footage with clips from an iPhone.
Why you must ask for metadata
I'm sure I ask this every few years but is there not a way to extract the camera shooting profile, gamma curve etc from clip metadata?
— Jonny Elwyn (@jonnyelwyn) February 16, 2023
Is EXIF reader the closest thing?
What do I not understand about this?#PostChat
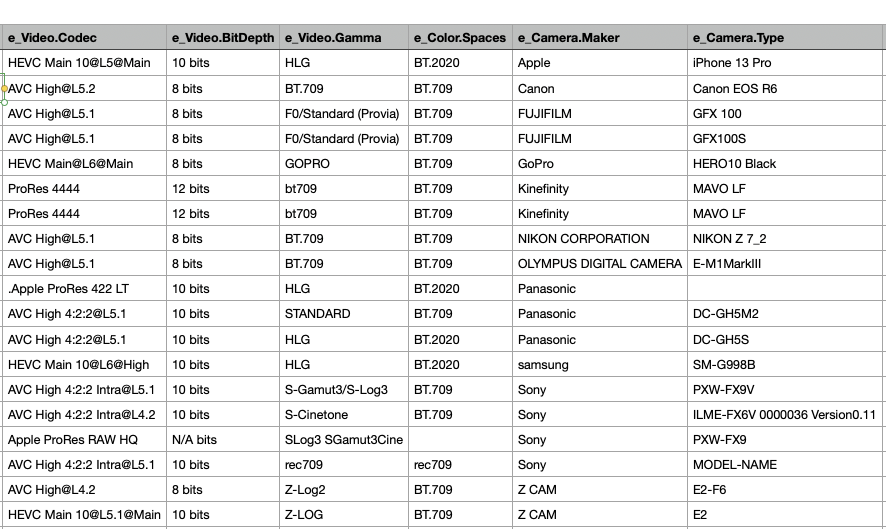
One thing to highlight here is that to get the best result from CineMatch, for each footage source you will need to know:
- The camera manufacturer
- Camera model
- Shooting profile
- Video level (full limited thing).
Improve Your Stock Footage
This metadata can be especially tricky to get hold of if you're using using stock footage as a lot of sites don't include this information in the download.
But quickly running your shots through one of the following apps can give you all the info you need to accurately apply CineMatch and more seamlessly weave your stock shots into the final edit.
From my own research there are a few free/cheap contenders that might help you, and a couple of paid options which both look like worthy champions.
Free/Cheap Video Metadata Readers
- VLC from Videolan
- Media Info from Media Area
- EXIF Tool Reader from MSAM Media (Mac GUI for EXIF reader)
- Baselight Look (free version of Baselight)
Of these 3 tools, the free EXIF Tool Reader delivered the most informative results in my testing.
Champion Pro Video Metadata Readers

Screen from VideoVillage was recommended by editor and colorist Jamie Le Jeune when I asked the Twittersphere for help in solving this problem.
In his experience it does the best job of reading camera metadata, even compared to some camera brand's own software tools.
In my own testing using various clips, including some stock footage downloaded from Artgrid - which gives you access to the camera original files when available - it did the best job of reading every piece of available metadata.
Screen costs $99 for a lifetime license with a year of updates.
EvrExpanse
Another excellent Pro app is EvrExpanse.
In my testing E correctly identified the shooting profile for a Sony FS7 shot (S-Gamut3.Cine/S-Log3) stock shot. One of the big benefits if you're probing a lot of shots is that EvrExpanse is designed to work with folders of footage and exports a handy CSV itemising the metadata for each file.
You can process one file with the free trial or purchase a professional license for about £55/$65.
There are a few steps to take to install EvrExpanse, including pre-installing Python 3 and the ASC MHL component.
Get more from your LUT Collection
Another tip, shared by Nick from FilmConvert in the video above, is to use FilmConvert's sensor matching process to make sure that your source footage is set up to better match with a LUT that you're applying to it - that may have been created with a specific camera in mind.
So, for example, you could match your iPhone footage to the ARRI camera pack and then apply an ARRI-based LUT to your iPhone footage, knowing you'll get a more accurate final look.
False Colour for Beginners
One of the really useful features in CineMatch is the false colour viewer. If you've not really worked with False Colours before, it's another way of viewing your image to see it from a different perspective, depending on the setting you choose.
CineMatch offers 4 false colour views:
- Middle Grey
- Skintones
- Temperature
- Tint
In the video above, Nick demonstrates how to use each of these false colour tools in turn. But essentially, you turn on false colour, select one of the four areas you want to isolate, for example, skintones, and make adjustments to your exposure, temp and tint controls until the skintones are illuminated in the false colour.
You can learn more about these tools in the official guide.
Take This Further
I cover all of these topics in a lot more detail over on the blog and share my own thoughts on working with CineMatch and some further tips and tricks for getting the most out of it.
So remember, there is an easier way and cut daily.
Get Instant Access to 300+ Issues of Cut/daily
Like these popular reads:
- #294 - Learn Baselight for Free
- #288 - How to Edit Under Pressure
- #281 - How to Organise a Fight (Scene)
- #276 - The Benefits of Compounding
- #256 - (HS) - The One Simple Trick Edition
Enjoy instant access to every single issue of Cut/daily so far, by upgrading your account for a one-off fee of just $49!